Gentleman's Portion

A good helping of life, love and whisky


4 Comments

REAL MEN DO EAT QUICHE, SO THERE

The young author creates quiche for a publicity demo

The young author creates quiche for a publicity demo

It’s a cold winter Sunday and already the tans from a fortnight in the southern sun are fading, so what better dish to make for breakfast than quiche, filled with memories of lazy afternoons in the heat of a French summer. In fact, we are off to a late start so it is going to be brunch after all. I make the pastry and then while we enjoy a cup of tea with the New York Sunday Times spread all over the bed, the pastry chills. Contrary to the view espoused in the book that started it all – Real Men Don’t Eat Quiche  – I don’t think I lack self-assurance. Indeed one needs a great deal of self-assurance to make any sort of pastry.

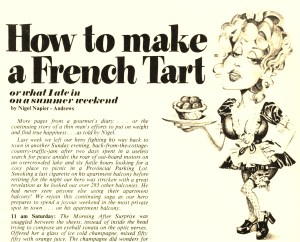
One of the first articles I wrote for the late Success magazine, was entitled (by the editor) “How to make a French tart.” Readers assumed I was being rude and giving advice on what to do on a dirty weekend in Paris. What I was really talking about is the true quiche, a pastry tart filled with creamy custard and bacon or ham, which comes from the French region of Lorraine. It is light and delicate so a small portion makes a great appetiser as equally as a large portion can constitute a main course. Back then I was buying frozen pastry shells, which will do in a pinch, but you can’t beat the taste of real pastry (see my blog on Jan 25 – The Life of Pie – for a never-fail recipe and a guaranteed touch of self-assurance).

A misunderstood headline

A misunderstood headline

QUICHE LORRAINE
Serves 4 to 6
Preparation time: 45 min
Cooking time: 35 min

Ingredients
9 in shortcrust pastry shell, partially baked
5 lean bacon rashers (or ham equivalent)
2 eggs plus 2 yolks
1 1/2 cups whipping cream
Salt and pepper
Pinch ground nutmeg
PAM spray

Weapons
9 in pie tin with removable bottom
sharp knife
mixing bowl
sauce pan
frying pan
baking rack

Preparation and cooking
1. Preheat the oven to 400°F/205°C. Push the pastry firmly into the corners of the lightly greased pie tin and then push aluminum foil down on top of it. Prick the foil right through the pastry with a fork to allow the air to escape. Bake for 10 min, then remove from the oven to a cooling rack, remove the foil and allow the pastry to cool a bit while you prepare the rest of the ingredients. TIP: With the proper 9 inch pie tin with a removable bottom, you can make a true quiche, where the sides are straight sided and stand supported only by the pastry shell. To ensure complete success, you can make the edges a bit thicker so they won’t collapse when you remove the outer ring of the tin.
2. Cut the bacon rashers into strips approx 1 in by 1/4 in and simmer in a saucepan of water for 5 mins. Remove, dry and then brown in a frying pan until brown. Set aside on a paper towel to drain the fat. Skip this step if you are using lean ham.
3. Prepare the filling: warm the cream in a saucepan, but do not boil. Take off the heat. Lightly beat the eggs and add to the mixture. Add salt, pepper and nutmeg and mix in well.
4. All the preparation is now done and apart from the final assembly, you will be eating in about 35 min. If this is too soon, leave all the ingredients separate for up to an hour and no harm will come. If the custard begins to separate a quick stir will rectify matters.
5. Reduce the oven to 375°F/190°C. Scatted the bacon over the bottom of the pie and slowly add the cream mixture until it almost reaches to top. If there is too much, discard it. Do not overfill the pie crust. Bake for 30 to 35 min, or until it is all puffed up, and golden brown on top.
6. To remove the pie from the tin, place it on a jar to push up the sides, which should easily fall away. Then slide the whole pie off the remaining metal disc onto a backing rack to set and cool a bit. TIP: Circulating air around the shell while it is cooling will prevent the pastry getting soggy on the bottom.

Vegetables
A green vegetable will add eye appeal, but should be something delicate in flavour, such as asparagus. Otherwise just serve a simple green salad.

Wine
From the area surrounding Lorraine come the white wines of Champagne, Alsace, the Rhine and Moselle, any of which would be appropriate. My own choice would be a fresh young Moselle in its slender green bottle, gently chilled.

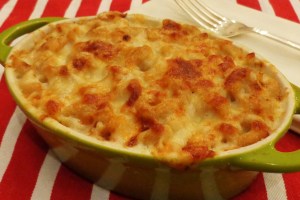
Cheese and spinach quiche

Cheese and spinach quiche hot out of the oven

CHEESE AND SPINACH QUICHE
Serves 4 to 6
Preparation time: 45 min
Cooking time: 35 min

You can really put almost anything you like into a quiche, such as onions, vegetables, seafood and more. Here’s a tasty alternative with cheese and spinach.

Ingredients
9 in shortcrust pastry shell, partially baked
3 large eggs
1 cup whipping cream + 1/4 cup milk
1/2 onion
1 clove garlic
1 package frozen chopped spinach (300g)
1 cup grated Gruyère cheese (200g)
Salt and pepper
Pinch ground nutmeg
1 tbsp butter (unsalted)
PAM spray

Weapons
9 in pie tin with removable bottom
sharp knife
mixing bowl
sauce pan
frying pan
baking rack

Preparation and cooking
1. Partially “blind” bake the pie shell at 400°F/205°C (see recipe above). Turn the oven down to 375°F/190°C while the pie shell cools.
2. Chop the onion finely and fry in the butter until translucent. Add the minced garlic and cook for another minute. Sprinkle over the bottom of the pastry.
3. Grate the cheese and add to the pie shell.
4. Thaw the spinach and press thoroughly in paper towels to remove all the moisture. If necessary, lightly fry it in the pan to thaw or dry it out. Add on top of the cheese and spread it out well.
5. Prepare the filling: warm the cream in a saucepan, but do not boil. Take off the heat. Lightly beat the eggs and add to the mixture. Add salt, pepper and nutmeg and mix in well. Pour carefully over the spinach and other ingredients until it almost reaches to top. If there is too much, discard it. Do not overfill the pie crust. Bake for 30 to 35 min, or until it is all puffed up, and golden brown on top.
6. Remove, cool and serve (see above).

PS: If you’ve enjoyed this recipe, please leave a comment or add your own versions for others to share.


1 Comment

ONE OF LIFE’S GREAT PLEASURES

One of life's great pleasures

A crusty loaf awaits beside the hearth

Omar Khayyam said: “A loaf of bread, a jug of wine and thou.” This afternoon Diane is off to see a movie with a friend and I am at home baking bread. When she returns I will offer her Omar’s three great pleasures. Perhaps she’ll accept two. Two out of three ain’t bad.

Today I’m using whole-wheat flour in the hopes of making a healthier loaf. When it has cooled sufficiently I shall cut myself a slice and slather it with unhealthy butter and eat it just like that. If it turns out well, I shall have deserved it.

The yearning for bread is visceral. When you want a slice of bread, nothing else will do. Your diet will tell you to eat a piece of crisp bread, but somehow it just doesn’t work. Sink your teeth into the lovely soft dough, crusty crumbs flaking onto your lips, butter melting onto your fingers. Mmm!

Bread is probably the oldest prepared food. We humans were eating bread 30 thousand years ago. It’s simple, wholesome, life saving food.  As I knead the dough, I feel a connection to all those bread making ancestors. Truly, this is a stress releasing experience. If you’ve already tried the white bread in my posting of January 31, 2013, you’ll know what I mean. Now you are in for an even healthier treat.

WHOLEWHEAT BREAD
Makes two 9 in by 5 in loaves
Preparation time 2 1/2 hrs
Baking time 45 min

Ingredients
Step 1
1/2 cup warm water
1 tbsp brown sugar
2 tbsp dry active yeast
Step 2
1 egg
1/2 cup melted unsalted butter, cooled to room temperature
1 1/2 tsp salt
1/2 cup brown sugar
2 cups warm water
6 cups whole wheat flour

Weapons
large mixing bowl
small mixing bowl
measuring devices
pastry spatula
loaf tin
knife

Simple yet delicious

Simple yet delicious

Preparation and cooking
1. Prepare the yeast by dissolving the sugar in warm water and then adding the yeast. Sprinkle it on top and stir to mix. Set aside for between 5 and 10 min to “proof” until it foams.
2. In the large bowl, beat the egg, add the melted butter, salt, sugar and warm water and mix well. Add the proofed yeast and mix again.
3. Add half the flour and beat well so there are no lumps. This step is hard work. Then gradually add the rest of the flour mixing it well all the time. About half way through this process the ball of dough will easily lift away from the bowl. Now start using your hands to knead the dough. When enough of the remaining flour has been added to make a soft ball of dough, turn it out onto a floured surface.
4. Knead the dough for 5 to 10 min, until it is smooth and elastic. Take the ball of dough, using the heel of your palms and a lot of effort, force the dough into a rough circle. Then fold it in half, rotate it a quarter turn and repeat. This is so much fun, I always do the full 10 min.
5. Cut the dough in half and put each half into a separate lightly greased bowl. Cover with a clean dish towel and set aside in a warm, draft free place for about 1 to 1 1/2 hrs, or until the dough had doubled in bulk.
6. Punch the dough down, shape into loaves (or see options below) and press into loaf or baking pan. Cover with towel and set aside to rise until double again, about 45 min to 1 hr.
7. Preheat the oven to 350°F/180°C. Bake the bread until golden brown and bread sounds hollow when tapped, about 40 to 45 min.
8. Turn out of the pan and cool on a wire rack.

A perfect accompaniment to any meal

A perfect accompaniment to any meal

Options
Rolls
5.Take one of the bowls of dough and after it has risen (step 5) make a large rough circle of dough by pulling and stretching it into shape. The dough will be quite elastic. Cut the circle into 8 segments.
6. Roll each segment very firmly in the palms of your hands until a perfect ball is formed.
7. Prepare a baking sheet with a layer of parchment paper. Place the ball on the paper and press it down. Make a slice in the top of the dough with a sharp knife. Repeat until all the dough is used up, spreading the balls out so they don’t touch. Cover and allow the dough to double, about 30 to 45 min.
8. Preheat the oven to  375°F/190°C. Bake until golden brown or about 15 to 18 min.
9. Place on a rack to cool.

Crescent rolls (NOT to be confused with croissants)
5.Take one of the bowls of dough and after it has risen (step 5) make a large rough circle of dough by pulling and stretching it into shape. The dough will be quite elastic. Cut the circle into 8 wedges.
6. Take each wedge, starting with the wide end of the triangle, and gently pull the dough to widen it. Roll it up into a tight crescent.
7. Prepare a baking sheet with a layer of parchment paper. Place the crescent onto the paper and push down to hold its shape, spacing them out so they don’t touch. Cover and allow the dough to double, about 30 to 45 min.
8. Preheat the oven to  375°F/190°C. Bake until golden brown or about 15 to 18 min.
9. Place on a rack to cool.

Other options
Substitute honey for brown sugar.
Add 1 cup of raisins before you knead the dough.
Add 1 cup toasted nuts or sunflower seeds.
Add 2 to 3 tbsp dried herbs to the flour while mixing.

My thanks to chef Paula Bambrick and the Loblaws Cooking School on Queen’s Quay for these recipes.

PS: Please leave a comment, if you found something useful or interesting in this recipe. Or please add your own variations for others to share.


Leave a comment

THE BREAD AND BUTTER OF BAKING

A slice of heaven

A slice of heaven

Diane noticed my hint in a previous post (December 8, 2012) and Julia Child’s Mastering the Art of French Cooking 50th Anniversary Edition showed up under the Christmas tree. What a wonderful surprise. I’ve not read any of Julia’s stuff until recently. I suppose my opinion was coloured by the great Saturday Night Live sketch where Dan Aykroyd, doing an uncanny imitation of Julia, cuts himself mortally.  Just before he loses consciousness he calls: “Save the liver!” According to Bob Spitz in his August 2012 biography Dearie: The Remarkable Life of Julia Child, an excellent read which I’ve just finished, she really enjoyed the Aykroyd sketch.

Certainly she seems to have had a wicked sense of humour, as evidenced by this story from Spitz’s book, which is worth repeating (I’m writing from memory as the book is back at the library). Late in her career, Julia is working with a new and stuffy lady producer. Julia decided to have some fun in the studio: “Hello, I’m Julia Child and today I’m making c*ck monsieur.” “OK, cut, let’s do another take,” comes over the studio intercom from the producer. “Julia, it’s croque monsieur.” “Sorry, I thought that’s what I said. Let’s do it again,” replies the star. She makes the same deliberate mistake on take two and by now the crew are in on the gag and are falling around trying to hold back their laughter. Again she protests she didn’t know what she’d said. She insists the producer tell her exactly what word she’d used. Over the studio speakers comes the frustrated producer’s voice: “Julia, you said c*ck.” And the whole studio collapses in hysterical laughter, except Julia who keeps a straight face and is the picture of innocence.

Julia talks about bread in Volume Two of Mastering the Art of French Cooking, which I’ve yet to receive. Spitz, in the biography, tells of Paul Child attempting to master the art of baking French bread using US flour and an American electric kitchen, almost an impossibility. Paul uses nearly 300 lb of flour before he gets something half decent. I don’t have that sort of dedication.

However, I did trot down to the Loblaws Cooking School on Queen’s Quay in Toronto when I heard chef Paul Bambrick (see my blog of January 25, 2013) was holding a bread making course.

BASIC WHITE BREAD (from Paula Bambrick)

Ingredients
2 tbsp live yeast
1 tbsp white sugar
1/2 cup warm water
1 egg
1/2 cup melted butter, room temperature
1 1/2 tsp salt
1/2 cup white sugar
2 cups warm water
8 cups unbleached bread or all-purpose flour

Weapons
1 small bowl
1 large mixing bowl
Pastry spatula
Measuring spoons and cups
2 loaf pans, 9 in by 5 in

Even better with butter and strawberry jam

Even better with butter and strawberry jam

Preparation and cooking
1. Prepare the yeast. In a small bowl put 1/2 cup warm water, dissolve in sugar and then sprinkle on yeast and stir to mix. Set aside to “proof” for 5 to 10 min, or until the mixture foams.
2. In the large bowl, add egg, butter, salt, sugar and 2 cups warm water. Mix well. Add the proofed yeast and mix again. Add half the flour and beat well until it is lump free. Add most of the remaining flour and beat well. Add just enough of the remaining flour to make a soft dough.
3. Turn the dough out onto a floured surface and knead until smooth and elastic. To do this take the ball, flatten it, then pull the top half over the bottom half and knead well, rotate the dough 1/4 turn and repeat for 5 to 10 minutes.
4. Grease the bowl with butter or Pam spray, add the ball of dough, cover with a cloth and set aside in a warm place, until the dough has doubled in size, or about 1 to 1 1/2 hours.
5. Punch the dough down (this is fun!), separate into two and push into the two well greased loaf pans. Or if you are making rolls, shape them now and put them on a well greased baking sheet,  spaced out. Cover again and set aside to rise until the volume has doubled again, or about 45 min to 1 hour.
6. Pre-heat the oven to 350°F/175°C. Bake the loaves until golden brown and the bread sounds hollow when tapped.
7. Remove from pan and set to cool on a wire rack.

OPTION: Substitute honey for the sugar and up to 6 cups whole wheat flour for the bread flour.

OPTION: Add 2 to 3 tbsp dried herbs to the flour before mixing.

PS: Please leave a comment, if you found something useful or interesting in this recipe. Or please add your own variations for others to share.


1 Comment

THE LIFE OF PIE

Pie perfection

Pie perfection

As I start this blog I am waiting for a pie to bake. For years I was afraid of pastry and always used store bought frozen products. While these are good enough, along with frozen pie shells, they are not the real thing.

Last summer I heard about Loblaws Cooking School on Queen’s Quay in Toronto and quickly signed up for a course with chef Paula Bambrick. Her instructions are clear, her recipes foolproof and she has an engaging teaching style, very hands on. I thoroughly enjoyed myself, learned a lot and signed up for a bread course as soon as it was offered.

Here’s Paula’s recipe, personally tested and proven on my long suffering dinner guests.

NEVER-FAIL PIE PASTRY (from Paula Bambrick)
The good thing about pastry is it can be made ahead and safely frozen. This recipe gives you enough for a double crust pie, so if you only need a base, just roll up half into a ball, wrap it in cling foil and freeze it for another time. (TIP: write the date on the plastic wrap with an indelible pen.)

Ingredients
2 1/2 cups cake and pastry (not all-purpose) flour
1/2 tsp salt
8 tbsp cold unsalted butter
4 tbsp cold shortening
8 – 9 tbsp cold water (about 1/2 cup)
Pam spray vegetable oil

Weapons
Large mixing bowl
Table fork
Rolling pin
Plastic wrap
9 to 10″ pie dish or flan tin with push up bottom
Aluminum foil

Preparation and cooking
1. In the mixing bowl, stir together the flour and salt.
2. Cut the cold butter and shortening into small pieces and add to the flour. Using your fingers (don’t be afraid to get messy!) rub in the fat until the mixture is grainy and resembles oatmeal.
3. While tossing the mixture with a fork, gradually add the cold water, until it begins to cling to itself. Don’t add too much. The amount will vary with the moisture content of your flour and general humidity in your kitchen.
4. Use your hands to form this into a smooth ball. Divide the dough into two unequal portions, tightly cover in plastic wrap and chill in the refrigerator for at least 1/2 hr. The large portion will be for the bottom of the pie and the smaller portion will be for the top.
TIP: It is critical to keep everything cool when making pie pastry. An overheated kitchen, hot hands, or a warm counter top can all conspire to end in an unsatisfactory result. If necessary put your rolling pin in the freezer, cool your hands under running water and simply open the kitchen window, or turn up the air.
5. When everything is ready and cool, take the larger ball and first kneed it out into a disc using your knuckles. Then on a floured surface roll it into a disc about 1/4″ thick. Roll the disc onto the pin and transfer it to the buttered (or sprayed with vegetable oil) dish or tin.
6. Set the oven to 400°F/205°C and while it is heating up, push the pastry into the dish or tin so it fits snugly all the way around. Trim off the excess and keep for later or discard. Cover the pastry with aluminum foil and push it firmly down onto the pastry. Prick all over with the fork.
7. Bake the pie shell for 10 mins. This is called “blind” baking and allows the pastry to partially cook so that when you add your pie ingredients the base is already firm. If you skip this step your pie may turn out soggy.
8. Now take it out of the oven, remove the foil and let the pie shell cool a bit before adding ingredients.

A tasty slice

A tasty slice

BLACKBERRY AND APPLE PIE
At this time of year,  pick whatever fruit is available for your pie filling. Granny Smith apples are in the store and blackberries were on special when I shopped, hence my choice of pie.

Ingredients
1 pie crust recipe (above)
4 cups peeled, cored and sliced green apples (4 to 6 medium size) such as Granny Smith
2 cups fresh blackberries
1 tsp lemon juice
1/2 cup packed down brown sugar
4 1/2 tsp cornstarch
1/2 tsp ground cinnamon
1/4 tsp ground nutmeg

Weapons
Large mixing bowl
Small mixing bowl
Aluminum foil
9 to 10″ pie dish

Preparation and cooking
1. Make the bottom pie crust as above and “blind” bake for 10 min at 400°F/205°C. Set aside to cool. Prepare the top pie crust.
2. Turn oven down to 375°F/190°C.
3. Put the peeled, cored and sliced apples in a large bowl with the rinsed and dried blackberries. Add a squirt of lemon juice to stop the apples browning. In a small bowl mix brown sugar, cornstarch, cinnamon and nutmeg and sprinkle over fruit. Toss well.
4. Pour the fruit into the partially cooked pie crust. Cover the pie with the rolled out top crust. Trim around the edge with a knife and keep or discard the excess. Pinch along the edges to seal, using a spot of water to stick it down if necessary. If you like, press it all around with fork tines for a decorative touch. Cut four of five small slashes into the pie crust to let the steam out.
OPTION: Brush the top pastry with milk to create a great browning effect, and/or sprinkle with sugar.
5. Bake on the middle oven rack with a sheet of aluminum foil underneath in case of spillage. TIP: Add strips of foil around the edge to prevent burning, remove 15 minutes before the end. Bake for 50 to 60 minutes, or until the pie crust is golden brown. Remove to a rack and cool to room temperature, or about 3 hrs. Enjoy with a scoop of ice cream, whipped cream or as is.

Peach lattice pie

Lattice pie

In later posts I’ll give you some other excellent ways to use pastry, such as
PEACH LATTICE PIE
CHERRY LATTICE PIE
PEAR TART
QUICHE PROVENÇAL
QUICHE LORRAINE
CHEESE AND SPINACH TART
and more.

As you can see from the photograph the LATTICE PIE I made turned out very well, although my first effort was a bit overcooked. With pastry, practice makes perfect.

TIP: Chef Paula explains the difference between Canadian and US all-purpose flour, which is why the above recipes call for Canadian cake and pastry flour for complete success. Canadian all-purpose flour has more gluten, which is great for pizza dough but not for pie crusts. Cake flour has almost no gluten.

PS: Please leave a comment, if you found something useful or interesting in this recipe. Or please add your own variations for others to share.


Leave a comment

THE GREAT TASTE OF MAC AND CHEESE

Original mac and cheese

Original mac and cheese

The origins of macaroni and cheese are buried in time, but it is clearly an immigrant dish, blending strong American cheese, a white sauce with its roots in England, mixed with Italian pasta. President Jefferson brought a personal pasta chef back from Italy and served baked macaroni and cheese in the White House in the early 1800s. Of course, when you think about it, it’s popularity in those days was obvious. Their cheese was often shipped aboard vessels that would be on their journey for a year or more. Royal Navy cheese was as hard as rock and the US version probably wasn’t much different. White sauce could be made with fresh milk and butter, but worked just as well with rancid butter and sour milk, and if the flour had weevils, then accept that there was more protein included. Dried pasta would keep forever. The first cookbook recipe for a macaroni and cheese pie was recorded in 1896 in the Boston Cooking School Cookbook. Kraft introduced their ubiquitous orange product in 1937 as a way to extend the market for their processed American cheese and their brand of macaroni.

Today, we still have a love affair with macaroni and cheese, but gourmet versions have come to the dining scene. One of our favourites is lobster mac and cheese. Mac and cheese topped with bacon and tomatoes for added flavour was a hit in my original cookbook. As an experiment, I try lobster flavoured pollock, to see if it makes a difference. It is a quarter the price.

Lobster mac and cheese

Lobster mac and cheese

Start out with the basic recipe and adjust to fit your own tastes. You can use more sauce to make it creamier, more cheese to make it richer and different toppings to make it your own.

When you smell that rich bubbling scent of cheese coming out of the oven, and your tummy rumbles in anticipation, then you’ll know you’ve got it right.

ORIGINAL MACARONI AND CHEESE

Ingredients
1 tsp cooking oil
1 1/2 cups uncooked short elbow macaroni (try whole wheat for a change)
2 tbsp butted
2 tbsp flour
2 cups grated white cheddar
1 1/2 cups milk
salt
1/4 tsp pepper

TIP: Use a pungent cheese such as strong or medium sharp cheddar. Strangely white works better than yellow. Never use pre-grated cheeses as they are covered with other chemicals to make them stay fresh and loose in the pack. Blend two or more cheeses, such as Swiss or Gruyere, together for a better effect.

Weapons
Large saucepan
Small saucepan
Cheese grater
Colander or sieve
Measuring cup
Wooden spoon
Whisk

Preparation and cooking
1. Fill large saucepan with water, bring to the boil, add cooking oil and salt. Add macaroni slowly so the water continues to boil. Stir occasionally to prevent the pasta from sticking to the bottom. Cook for about 6 min for al dente.
2. Set the oven to preheat at 390°F/200°C
3. Grate the cheese and set aside 1/2 cup for the topping.
4. Make a white sauce with the butter, flour and milk, using the ROUX method. Add the cheese and stir until well melted. TIP: The sauce works better with hot, not boiling, milk.
5. When the macaroni is cooked, drain using the colander or sieve, rinse thoroughly with cold water and toss to remove excess water. Return to saucepan, pour on sauce and mix well. TIP: Rinsing the pasta after cooking it al dente is important. It removes the excess starch which will adversely affect your dish when it is cooking. Under- rather than over-cook the pasta. It will finish in the oven as it bakes in the rich sauce.
6. Spoon the mix into a casserole, or individual serving dishes, and add the rest of the cheese topping.
7. Cook in the oven, on a baking sheet or aluminum foil to prevent spilling, for 15 min, then turn heat to broil for a further 5 min or until the cheese turns golden brown. Serve immediately.

TIP: This dish keeps well in the fridge for reheating as a snack.

Topped with bacon and tomatoes

Topped with bacon and tomatoes

VERSIONS
Bacon mac and cheese: Fry several rashers of bacon, cut up a couple of ripe red tomatoes. Lay the tomatoes and bacon over the top of the mac and cheese before adding the topping. Try adding some breadcrumbs to the grated cheese you have set aside for the topping for a toasty effect.
Lobster mac and cheese: Buy a whole cooked lobster. Remove all the meat from the tail and claws and chop roughly. Stir into the mac and cheese before baking and proceed as above. Reserve the meat of one claw and place on top as a tasty decoration.
Budget lobster mac and cheese: At our taste testing, the lobster was clearly a superior taste, but replacing the lobster with much cheaper ready-to-eat lobster flavoured pollock was deemed absolutely fine. If we had not eaten the two dishes side by side, no one would have known the difference.

For a ROUX SAUCE see my blog of December 8, 2012.

PS: Please leave a comment, if you found something useful or interesting in this recipe. Or please add your own variations for others to share.


2 Comments

A SENSE OF NIÇOISE

An aromatic veggie casserole

An aromatic veggie casserole

The air is redolent with the scents of southern France as I cook up a casserole of ratatouille Niçoise, a succulent, rich veggie dish. It takes a bit of time to prepare as all the ingredients are cooked separately and then assembled for a final baking to mingle the flavours. The wait is worth it. Ratatouille can be eaten as a main course, on its own or as an accompaniment to a simple meat dish, hot or cold, and is wonderful as a left-over the next day, when the flavours have, if anything, become more intense and integrated.

I’m thinking a lot about my readers these days, who is reading my blog and what they are getting out of it. After a month with more than a dozen articles published, recipes are running about equal in popularity with travel stories.

My credentials as a cook are simple. I’m not a chef, just someone who likes home cooking. Everything I do I’ve taught myself and what turns out well is usually the result of a lot of experimentation. I found cooking so much fun, and had such an appreciative audience for my earliest efforts, that I wanted to share some of those I made many years ago. Now I want to share more that I’ve come to enjoy since.

Not such a success, as it turned out

Not such a success, as it turned out

I started writing a food column for a Canadian magazine. It was called Success and it wasn’t, folding after less than half a dozen issues. But it did catch the eye of a publisher, who saw one of my pieces and asked if I would consider putting my columns together for a book. It was a stretch to jump from three or four columns in a pseudo-Playboy magazine, to writing a whole book. My friends had to endure months of trials and errors as I slaved away to produce simple food that would be easy to cook, with a guaranteed method of preparation.

I worked out a formula, based on what seemed to work best for me: lay out all the ingredients first to check that I had everything I needed, then lay out all the tools to ensure I had the right weapons for the battle ahead, and finally an easy-to-follow step-by-step list of instructions. Once the experimentation was over, I cooked the food again just from my recipe with no ad libs, to make sure it worked perfectly. The publisher liked my approach and after a lot more work revising and re-checking, a publication date was set.

The book still didn’t have a name, but I was meeting with the late Alan Edmonds, then at Maclean’s Magazine, and before his career as a television presenter, who was helping me fix a travel article that editor Peter Newman had savaged. We patched up the story and repaired across the street for a cheap Chinese lunch, where I told Alan about my planned cook book for bachelors. He wrote an idea on a paper napkin and pushed it across the table. “That will sell,” he said. The publisher and I both thought it was brilliant.

A well-launched cover

A well-launched cover

“How To Eat Well and Stay Single” enjoyed a modest success in paperback and though it has long been out of print, I’ve never stopped cooking.

Now about the girl on the cover, who the attentive reader will have spotted also appears on Success. The publisher, a woman I might add, thought it would enhance sales if we put a girl on my book. The art director had the idea of having her curled up on a plate, and naked. I imagine it was supposed to be an ironic comment on the sexual mores of the times. Who knows if it sold any more copies, but it certainly brought a rush of publicity to our book launch.

RATATOUILLE NIÇOISE (page 154) © 1974 renewed 2012 Nigel Napier-Andrews

Serves: 4
Preparation time: 35 min
Cooking time: 40 min
 
Ingredients
1 large eggplant (aubergine) approx 3/4 lb
3 or 4 medium zucchini (courgettes) approx 3/4 lb
3 or 4 ripe tomatoes
3 medium onions
1 large green, yellow or orange bell pepper (capsicum)
3 cloves garlic
1/2 cup olive oil
1 tsp basil
small bunch parsley
ground black pepper
salt
 
Weapons
large frying pan
large casserole
large bowl
chopping board
sharp knife
measuring cup
vegetable peeler
spatula
paper towels
 

Preparation and cooking
1. Peel the eggplant and discard the skin and stalk end. Cut into 1/2 inch thick slices, then halve or quarter the pieces so they are all about the same size. Put in a bowl and sprinkle liberally with salt.
2. Wash the zucchini, then slice into 1/2 inch rounds, discarding the ends. Add to the bowl of eggplant and mix together well, cover with a cloth or paper towel and leave it to sit for 30 min. You’ll be amazed at how much moisture is pulled out of the flesh. Drain it off.
3. Heat some of the oil in the frying pan and brown first the eggplant and then the zucchini on both sides. You may find they absorb an amazing amount of oil, so add more as necessary. When done, remove and lay out on a double thickness of paper towel to drain off some of the oil. Preheat the oven to 350°F/175°C.
4. Peel the onions and chop very finely. Remove the seeds and stalk from the bell pepper and chop roughly into 1/4 inch squares. Cut the garlic cloves into thin slices and cook them in the same frying pan and oil as before, until they begin to turn brown. Then remove the pieces and fry the onions and green pepper in the garlic flavoured oil, until the onions turn transparent.
5. Drop the whole tomatoes into a pan of boiling water and leave for 1 minute. Remove with a slotted spoon and dry. With a small, sharp knife cut out the eye and then peel off the skin. It should slide off easily. Cut into chunks, add to the onion and pepper mix and simmer until much of the liquid has steamed off. Sprinkle on the basil and parsley and mix in well.
6. Now assemble the casserole. Make a layer with half the onion mix. Then add a layer of eggplant, a layer of zucchini another layer of eggplant if there is any left, and finally the remainder of the onion mix.
7. Cover with a lid or crimp aluminum foil down around the edges to seal everything in. Cook in the oven at 350°F/175°C for 40 min.
8. Serve as a hot veggie appetiser, a veggie main course, as a vegetable accompaniment to simple meats, such as roast beef or lamb, roast whole chicken, grilled chicken breasts or thighs, or as a cold accompaniment to cold cuts.

NOTE: I taste test this recipe before, during and after photography. Honestly, the next day it’s even better.

As Julia Child would say: “Bon appetit!”

PS: Please leave a comment, if you found something useful or interesting in this recipe. Or please add your own variations for others to share.

3 Comments

THE SUBLIME EGGS BENEDICT

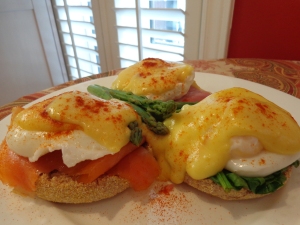
L to R: Eggs Royale, Benedict and Florentine

L to R: Eggs Royale, Benedict and Florentine

There are two famous New York eateries, which each say their version of eggs Benedict is the real one.I prefer the claim of Delmonico’s Restaurant, the very first public dining room ever opened in the US, since theirs is clearly the oldest. In the 1860’s, a regular patron of the restaurant, Mrs. LeGrand Benedict, wanted something different to eat and asked Chef Charles Ranhofer (1836-1899) for his ideas. He offered her a dish which he named eggs Benedict and published the recipe in his cookbook, The Epicurean in 1894.

Coincidentally, that same year, 1894, Mr. Lemuel Benedict, a Wall Street broker, who was suffering from a hangover, apparently ordered “some buttered toast, crisp bacon, two poached eggs, and a hooker of hollandaise sauce” at the Waldorf Hotel in New York. The Waldorf’s legendary chef, Oscar Tschirky, was so impressed that he put the dish on his menu and named it after the banker.

Whatever the story, eggs “Benny” and a couple of variations seen here, are one of my favourite Sunday brunch foods.

I serve them with a few lightly steamed asparagus spears on the side and either a bloody Mary or a crisp prosecco, cava or dry sparkling wine.

EGGS BENEDICT

Serves: per person
Preparation time: 5 min
Cooking time: 10 min

INGREDIENTS
2 fresh large room temperature eggs
1 English muffin
5 or 6 slices thinly cut ham to cover the muffins
2 tbsp HOLLANDAISE SAUCE
6 asparagus spears
White vinegar
Paprika

WEAPONS
Deep sided 10 or 12 in frying pan
Asparagus steamer, or vegetable steamer
Saucepan
Wooden spoon
Slotted spoon
Chef’s tongs

1. Prepare the HOLLANDAISE SAUCE and set to one side over a very low heat.
2. Fill a deep sided 10 in frying pan with water, add a good splash of white vinegar, and bring to the boil. The vinegar will help the albumen in the eggs hold together. Salt will substitute.
3. Wash the asparagus, and break off the tough ends. The spear should break exactly where the tender part ends and the tough part starts. Make sure the flower end is washed clear of sand.
4. Put just 1 in of water in the bottom of the steamer and set to boil. Add the asparagus and steam for 5 min.
5. At the last minute, add the carefully broken eggs to the boiling water and turn off the heat. Let the eggs sit for 3 min for soft and 5 min for medium.
6. Break, do not cut, the muffins in half and toast.
7. Plate the muffins, arrange the slices of ham on top of the muffins, using a slotted spoon, gently lift each egg out of the water, drain excess water on a paper towel and then carefully slide the egg onto the ham. Top with a couple of spoonfuls of sauce and finish with a touch of paprika for colour. Decorate with the asparagus spears and serve immediately.
TIP: Up to 8 eggs can be poached at once in a 12 in pan. Break them into opposite sides of the pan as you go, to avoid the whites mingling, and remember where you started so you can lift the most cooked egg first.

HOLLANDAISE SAUCE
If you are in a panic about this, use a packet mix. But the taste is infinitely superior if you make it from scratch. It only takes 5 min and can then rest while you prepare the remainder of the ingredients.

INGREDIENTS
3 egg yolks
1 tbsp lemon (or less!)
1/4 lb melted butter
1 tbsp hot water
pinch cayenne pepper

WEAPONS
Double steamer, or a bowl over a pan of boiling water
Whisk

PREPARATION AND COOKING
(See my blog of December 26, 2012, for an easy way to separate eggs.)
1. Beat the egg yolks in a pan over hot water so they start to thicken.
2. Add a few drops of lemon juice and keep beating.
3. Add melted butter slowly to form an emulsion.
4. If at any time it starts to separate, add a little very hot water and beat in gently.
5. Taste and add more lemon juice if necessary. Season with a pinch of cayenne pepper for colour and bite.
TIP: Keep a kettle or pan of boiling water going on the side for emulsion separation emergencies. Just a drop at a time will rescue most sauces that look as though they are curdling.

EGGS FLORENTINE
Replace the ham with lightly steamed spinach for a vegetarian version. The spinach can steam along with the asparagus.

EGGS ROYALE
Replace the ham with smoked salmon or gravad lax for another delicious alternative.

PS: Please leave a comment, if you found something useful or interesting in this recipe. Or please add your own variations for others to share.


2 Comments

SOUP FOR THE SOUL

New Year's Day on Toronto Island

New Year’s Day on Toronto Island

French onion soup is the perfect soul food for our annual New Year’s Day adventure.

Each year, a group of hardy sailors venture over to our clubhouse on frozen Toronto Island. Some take the ferry to the other end of the island and walk for 40 minutes. Others take a water taxi, if it’s running and the harbour isn’t too full of ice. Some celebrate New Year’s Eve on the island and stay with friends who live there, so their morning journey might even be accomplished by bicycle if the road has been ploughed. The first group who arrive light our old wood stove and in minutes there is a nice warm fug. We all bring a pot-luck food item to share with everyone. Some years only a handful straggle over, usually due to very inclement weather, and other years as many as 30 show up, members, family and friends. The location is one of Toronto’s best kept secrets, but here’s a hint: the Harbour City Yacht Club floating clubhouse is located at: 43° 37′ 15″ N 79° 22′ 53″ W.

Now this version of onion soup is not fully authentic, because it uses turkey stock instead of beef stock. This robs it of it’s rich beefy colour, and perhaps makes it a blander, sweeter taste. However, it’s a wonderful way to make something different with all those turkey left-overs after the holiday.

I first came across authentic onion soup in Paris in the early sixties. Young Londoners would head over to the city of light for the weekend because London was still a dull city then and Paris was easy to reach on the train. We’d end up in strange Gypsy bars on the Left Bank listening to sad songs, or in wild nightclubs like Le Crazy Horse Saloon (much more fun than the Moulin Rouge, until the movie “What’s New Pussy Cat” spoiled it for everyone, by putting it on the tourist map). Then it was traditional to join the porters and other denizens of the night (whores, drunks and stray cats) for a bowl of steaming onion soup at a stall in the great market at Les Halles. The French government, with a strange disregard for tradition, pulled down the market and moved it out to the suburbs. Something of the atmosphere, and at five o’clock in the morning it was some atmosphere, must have permeated the soup, because I’ve never been able to quite replicate the exact same taste.

FRENCH ONION SOUP (Soupe à l’oignon) (“How to Eat Well and Stay Single” page 53)
Serves: 4 – 6
Preparation time: 20 min
Cooking time: 2 hr

INGREDIENTS
2 lb yellow onions (7 to 9) to make 4-5 cups thinly sliced
1/8 lb (1/4 cup) butter
2 tbsp cooking oil
3 tbsp flour
1/2 cup cooking sherry or brandy or dry white wine
5 cups fresh TURKEY STOCK (TIP: Substitute beef stock to make the soup a richer brown)
salt and pepper to taste
OPTION: Pinch or two of sugar

WEAPONS
Large heavy saucepan
Medium saucepan
Mixing bowl
Wooden spoon
Sharp knife
Chopping board
Measuring cup
Ovenproof soup bowls

PREPARATION AND COOKING
1. Peel and slice the onions thinly.
2. Heat 1/4 cup butter and 2 tbsp cooking oil in the pan until they are bubbling and the butter has stopped frothing. Add all the onions and immediately turn the heat down to low. Cook the onions very slowly for about 45 min, by which time they should be a golden brown. Sprinkle in the flour and cook for a further 3 min, stirring all the time to prevent burning. (TIP: To further brown the onions add a pinch or two of sugar to the pot and stir in well.)
3. In a separate pot bring the stock to boiling.
4. Take off the onions off the heat, add the stock and mix thoroughly. Add the wine and cook partially covered at a very low simmer for 30 or 40 minutes more.
5. The soup is now ready for serving as it is, or for serving with cheese (see below) or for keeping covered in the fridge until needed.

Onion soup with a cheese crouton

Onion soup with a cheese crouton

SOUPE À L’OIGNON GRATINÉE
1. Cut 8 to 12 3/4″ in slices from a loaf of French bread
2. Toast them thoroughly, or bake on a baking pan in the oven at 320°F/160°C for about 30 minutes until they are thoroughly dried out and golden brown croûtes. OPTION: halfway through the baking rub both sides with olive oil; after baking rub each piece with a cut slice of garlic.
3. Float one or two croûtes on each ovenproof bowl of soup, sprinkle on grated Swiss or Parmesan cheese and brown under a hot broiler before serving.

TURKEY STOCK
1 turkey carcass, all traces of stuffing removed
Any left-over skin, meat or bones
2 bay leaves
1 sprig parsley chopped roughly
2 carrots peeled and roughly chopped
1 onion not peeled, dry skin and all, quartered

1. Cover carcass and all ingredients with water, simmer for at least 2 hours. Skim off excess fat.
2. Drain off broth to remove bones, cooked vegetables etc, then strain again until a clear broth is left.
3. Reserve or freeze for use in gravies and soups.

Happy New Year!

PS: Please leave a comment, if you found something useful or interesting in this recipe. Or please add your own variations for others to share.


1 Comment

SOMETHING LIGHT AND FLUFFY

Whipping up something light and fluffy

Whipping up a few egg whites

Just when you thought you couldn’t eat another thing, along comes Boxing Day. You can either eat left-over turkey, or try this classic French egg dish for a change.

CHEESE SOUFFLÉ ( from “How to Eat Well and Stay Single” page 80) © 1974 renewed 2012 Nigel Napier-Andrews

Serves: 4

Preparation time: 20 mins
Cooking time: 25 mins

The mystique surrounding the classic French soufflé au fromage is enough to deter the most daring beginner. But do not be deterred. It’s much easier to make a light fluffy soufflé rising three inches out of the dish and a delicate golden brown on top, than it looks. And when you make it you will be acclaimed a hero, because your guests will probably think it is as difficult to make as most people. A word of warning though. Occasionally, something will conspire against you (perhaps the wrong oven temperature or less than fresh eggs) and your soufflé won’t rise much, so for this reason don’t ballyhoo about your prowess in advance. Let the success speak for itself, and put the semi-failures down to experience.

INGREDIENTS
4 large fresh eggs, room temperature
3/4 cup whole milk
3/4 cup grated strong cheese (cheddar or similar)
1 tbsp flour
1 tbsp butter
1 tsp salt

WEAPONS
8 in soufflé dish (non-stick lining is useful)
2 mixing bowls (not plastic)
small saucepan
measuring jug or cup
whisk
wooden spoon

PREPARATION AND COOKING
1. Preheat oven to a moderate 350oF/175oC and put plates in warmer drawer. You must have hot plates when serving a soufflé or it will go soggy before it can all be eaten. (TIP: wet the plates and put them in the microwave for a minute or so on high.)
2. Separate eggs, with yolks in one mixing bowl and whites in another.
3. Make 1 1/2 cups of cheese sauce by the ROUX method.
4. Beat the egg whites until they are quite stiff.
5. Let the roux sauce cool and then tip it into the egg yolks and stir together thoroughly. Add 1 tsp salt and mix in. Now take a spoonful of egg whites and add to the sauce and yolk mixture. Gently stir in to lighten the sauce so that it doesn’t crush all the air out of the whites.
6. Gently pour the now lightened sauce into the egg whites and very gently mix together. You may find there is too much sauce for the whites to hold. In this case don’t add it all since it won’t harm the finished product if left out, but may prevent it from rising properly if added. (If you are not using a dish with non-stick lining, lightly grease it with Pam cooking oil spray or butter beforehand.) Ladle the sauce mixture into the soufflé dish with the wooden spoon to just below the top, and then run the spoon around the inside of the dish to make a sort of channel about an inch deep.
7. Place the dish immediately into the centre of the oven preheated to 350oF/175oC. Cook for 25 min without opening the oven door and don’t make too much noise. I’m not sure if a slammed door would make a soufflé sink, but that’s what they say and I’m not going to wreck a perfectly good soufflé finding out!
8. Take the dish to the table and serve immediately onto hot plates. Any delay and it will begin to subside.

ACCOMPANIMENTS
Since the timing of a soufflé is so crucial, it would be asking for trouble to serve anything that needed cooking along with it, in case it wasn’t ready at the same time. I suggest you serve it just as it is so nothing fights with the delicate flavour and serve a fresh green salad afterwards in the French manner. You can also serve cheese soufflé as an appetiser course.

WINE
A well chilled very dry white wine.

TIP: Separating eggs
Start with the eggs at room temperature. Crack each egg in half gently over the bowl that is to contain the whites. Hold the halves of shell close together and tip the yolk, without breaking it, from one half to the other allowing the white to dribble into the bowl below. When all the white is separated tip the yolk into the other bowl. If any pieces of shell get in remove them immediately or you might forget.

TIP: ROUX – BASIC INGREDIENT OF FRENCH SAUCES
Melt 1 tbsp butter over a medium heat and when the butter is just beginning to foam, add 1 tbsp white flour and stir with a wooden spoon for about 3 min until the mixture is crumbly. Then add 1 cup of the appropriate liquid to complete your roux.

Roux as a basis for cheese sauce: to the butter and flour mixture slowly add ¾ cup whole milk and when the sauce has thickened add about ¼ lb or ¾ cup of strong cheddar grated. Stir together over low heat until the cheese melts. Great served over veggies such as broccoli or cauliflower, or used to make CHEESE SOUFFLÉ.

Roux to thicken boeuf bourgignon: use 1 tbsp butter and 1 tbsp flour for each cup of sauce. Add strained sauce to the roux and stir gently. When it thickens add the sauce back into the stew.

PS: Please leave a comment, if you found something useful or interesting in this recipe. Or please add your own variations for others to share.


2 Comments

ROAST FOR THE HOLIDAYS

Diane has brought me a copy of The Times back from her visit to UK. We can get a pale version in Canada but it is missing the Magazine, perhaps one of the best weekly magazines around.

I enjoy Tony Turnbull’s article entitled Easy Eats for Christmas: The only four recipes you’ll ever need for roast potatoes. You’ll have to subscribe to read the whole piece or any of his continuing series of four essential ways to make dishes you’ll want to return to time and time again. If you like Tony Turnbull, here’s a complete list of his stuff.

I won’t give away Tony’s secrets here, especially as I have a couple of my own foolproof recipes for this most important accompaniment to any roast meat.

Jamie Oliver, who I also like, has a super recipe too.

Here’s an original one from my book, which, you will recall from earlier blogs, was designed for novice cooks and especially bachelors.

ROASTED POTATOES (page 166) from “How to Eat Well and Stay Single” © 1974 renewed 2012 Nigel Napier-Andrews

Peel several large (not new) potatoes and remove the eyes. Use a potato peeler rather than a knife as this will remove too much of the potato under the skin, where most of the goodness resides. Cut the potatoes into chunks between 1 and 1 1/2 inches across and place in cold water. Add 1 tsp salt and bring to the boil, then cover and cook at a fast boil for no more than 7 min. This half-cooking is called “parboiling.” Drain the potatoes, which should be just going soft on the outside, but still completely firm on the inside and leave them to cool in a colander.

The potatoes will take about 45 min to roast through in the oven so you will be at least half way through cooking the meat before you have to worry about them. The secret of really good roast potatoes, just crispy on the outside, soft and flaky on the inside and golden brown all over, is to start them off in very hot fat. Since your oven setting is only 325°F/175°C for the meat, heat up a flat ovenware dish, a couple of inches deep and large enough to take all the potatoes without them touching, in the oven, so that it doesn’t cool the fat when you add it. In a saucepan heat to frying temperature, a cup or more of fat. Beef dripping or lard is best, but cooking oil will do in a pinch. Then the time is right, pour the fat into the dish so that it is about 1/2 inch deep and then add the potatoes. Baste them after a few minutes and when the bottoms are done, turn them over. Baste again a few minutes later and turn again if necessary. Don’t let them get too brown or they will be crunchy on the outside and dried to a hollow shell inside. Drain and serve with the roast.

TIP: Get the edges of the parboiled potatoes fluffy by “scumbling” (an English word) or tossing them gently in the colander just before you add them to the hot fat.

For additional flavour Tony offers garlic, bacon and thyme; fennel, chilli and rosemary; or tomato and paprika. Jamie suggests rosemary; sage and clementine zest; or thyme and bay leaves. I’ll try these one day. In the meantime, here’s my own recipe to tart up the roast potatoes with some herbs and zest.

Lemon and thyme roast potatoes

Lemon and thyme roast potatoes

LEMON AND THYME ROAST POTATOES (serves 4)

INGREDIENTS
8 large potatoes, peeled and cut lengthways
Skin or “zest” of a whole lemon
8 – 10 whole cloves of garlic (unpeeled)
5 – 6 sprigs of fresh thyme
1 tsp sea or Kosher salt
Cooking fat or oil

WEAPONS
Large saucepan
Colander
Large ovenware casserole dish approx 2 inches deep

PREPARATION AND COOKING
1. Wash and peel the potatoes and cut lengthways.
2. Parboil for 7 minutes in boiling salted water, drain in colander, and toss lightly or “scumble.”
3. Peel a whole lemon to make the zest and chop into fine strips.
4. In the oven, heat the fat or oil until it is sizzling, add the potatoes and baste with the hot fat. Sprinkle on the chopped zest, whole segments of garlic, still unpeeled, and whole sprigs of thyme. (Keep the rest of the lemon wrapped up for another use later.)
5. Roast for up to 90 min at 355°F/180°C, turning once at 45 min.
6. Lift out of the pan with a slotted spoon to leave the fat and garnishes behind and keep warm on a paper towel in the oven until ready to serve.

A perfect accompaniment to ROAST TURKEY, ROAST GOOSE, ROAST BEEF or ROAST PORK, all of which recipes are to come next year.

PS: Please leave a comment, if you found something useful or interesting in this recipe. Or please add your own variations for others to share.